Custom Home

Why Designing and Building a Custom House is Better Than Buying

Are you in the thrilling process of finding a new home? The decision to buy a house is a huge commitment, but have you considered the benefits of designing and building a custom house? While purchasing an existing home may seem like a convenient option, there's something truly exceptional about customizing every aspect of your dream home. In this blog post, we'll explore why designing and building a custom house is an incredibly rewarding choice, and more accessible than you might think.

Unleash Your Creativity

One of the most compelling reasons to choose a custom house is the opportunity to unleash your creativity. When you buy an existing property, you may have to make compromises and settle for features that don't align with your personal style, taste, or needs. On the other hand, with a custom house, you have the freedom to collaborate with a design team to craft a home from the ground up according to your preferences.

From the layout, architecture, and interior design elements to the selection of materials and finishes, every detail is under your control. You can create spaces that reflect your personality and accommodate your specific needs, whether it's a spacious open-concept living area, a home office with plenty of natural light, or a luxurious master suite. The possibilities are boundless.

Maximize Functionality

Another significant advantage of designing and building a custom house is the ability to maximize functionality. Existing homes might have limitations in terms of layout, storage, or access to natural light. By starting from scratch, you can optimize the entire design to suit your lifestyle perfectly and ensure the home will function according to how you live.

Consider your daily routines and the flow of your household. Are you an avid entertainer? Then you can design a welcoming and expansive dining area that seamlessly connects the kitchen and living spaces. Do you love spending time outdoors? Plan for a beautiful backyard with a deck or patio, providing an oasis for relaxation and alfresco gatherings.

Creating a custom house allows for clever storage solutions, smart home technology integration, eco-friendly features, and energy-efficient design choices. By incorporating these elements, you can ensure that your home not only reflects your preferences but also enhances your daily life.

Financial Investment

While designing and building a custom house may seem cost-intensive initially, it can actually be comparible as an investment to buying a house on the market, and should be a sound financial investment in the long run. When you buy an existing house, there may be hidden maintenance issues or outdated systems that could lead to unexpected expenses down the road. By starting fresh with a custom build, you have control over the quality of materials, appliances, and overall construction.

Additionally, a custom house offers better value retention. As your home is specifically tailored to your needs and preferences, it stands out from generic houses on the market. It will likely have a higher resale value due to its unique features, premium craftsmanship, and customized finishes.

Building for the Future

Designing and building a custom house allows you to future-proof your home. You can integrate sustainable and energy-efficient features, such as solar panels, high-quality insulation, and water-conserving fixtures. By prioritizing environmentally friendly choices during construction, you contribute to a greener future and potentially reduce your utility bills.

Custom houses also give you the opportunity to plan for the future. If you have a growing family or envision aging in place, you can incorporate adaptable features like wider doorways, no-step entrances, or a main-level bedroom suite. Building a home that caters to your long-term needs ensures comfort and convenience for years to come.

Conclusion

While buying a house offers immediate occupancy, designing and building a custom house provides an unparalleled opportunity to create your perfect sanctuary. From igniting your creativity and maximizing functionality to making a sound financial investment and building for the future, the benefits of a custom build are immeasurable.

If you're ready to embark on an exciting journey of self-expression and create a home that truly reflects who you are, the decision is clear. Consider the advantages of designing and building a custom house – a tailor-made abode that you can proudly call your own.

Design Process: Additional Services

We have outlined the general phases of the design process in earlier posts. However, there often are other services that we offer to make your project easier to achieve. None of these are required to get an ADU designed, permitted, and built, but some can make your project a greater success or take some work off your plate so you can focus on other things. Additional services for ADUs or Custom Homes allow us to customize the service offerings to the unique needs of each client and each project.

Property Search and analysis (Feasibility Study)

You are looking into buying a new home and want to know what the potential is to add an ADU as a rental unit. Or perhaps you want to analyze your current property to better understand the opportunities and challenges for adding an accessory dwelling unit or other property improvement project - like a major addition, remodel, or even a new custom home design. It is also a great idea to do a feasibility study when considering purchasing of a piece of land. If you are considering any of these options a feasibility study is highly recommended as the first step. Whether you hire us or engage another design team, it is worth investing in this preliminary research before you commit to a larger project or before you close on a property purchase. Zoning research, site analysis, property review, and other research is can save significant money or prevent you from beginning a project before knowing exactly what is allowed. Whether you are considering an ADU, a major remodel, or a custom home design, this is a valuable service that is worth the upfront investment.

Interior Design

Some clients love shopping for materials, finishes, appliances, and picking out colors and other interior elements for their homes and ADUs. Others don’t have the time and want someone to assist with this process. Since most interior finish selections don’t affect the permitting process this service isn’t necessary to get a custom home or ADU approved to build, but it can make a big difference for the look and feel of your project. An interior design that matches the aesthetics of the exterior and creates a welcoming environment can make or break your project. And interior design is especially important if you are planning to rent out the ADU as a long or short term rental. You want durable materials and finishes as well as a noteworthy, photogenic design that will set your rental apart from the competition. This service can include selecting all of the finishes like tile, counters, cabinets, fixtures, and hardware or can include additional tasks like helping select furniture, artwork, and other decorations to bring the space together and feel warm and inviting. Custom home and ADU Interior Design can take a great deal of time and effort but can have a great return on investment. This is why we recommend that our clients hire a professional designer to assist with this work. Typically we like to work with you to at least select all of the materials, finishes, and fixtures that will be attached to the structure which is why we offer interior design as an additional service for our ADU and custom residential clients.

Existing Conditions Drawings (As-Builts)

Most of the projects we work on are detached new construction ADUs or custom residences. However, when an ADU interacts with an existing structure on your property it is necessary to document the existing conditions. Often these are called as-built drawings, and include creating dimensioned drawings of all the existing spaces and structures that will be affected by the project. Most designers will offer this service or sub-contract it out to another drafting company. It is worth the investment to get an accurate drawing set that shows the current conditions of your home before you start any project.

Renderings

Three dimensional views of the project are another part of the design process that isn’t necessary for the permit approval process but can be a great tool to make design decisions. Taking these views a step further, you can use modeling and drawing software to create rendered views that show materials, finishes, lighting, furniture, people and other effects to really show what the spaces will look and feel like. We often do a couple exterior and a couple interior renderings so our clients can see an approximation of what their project will look like after it is finished. This allows them to have the confidence they will like the final design prior to starting construction. Good renderings do take time and thus cost money, but we always find it is worth spending a bit of extra effort during the design phase to prevent changes or worse, regrets, once construction begins. A couple thousand dollars during design can save tens of thousands during construction. If you are unsure about what your project will look like or how the interior spaces will feel by looking only at plans, sections, and elevations, ask your design team to make some renderings. It is an added service but can give you a better sense of the final project plus are great to share with friends and family so they can see what you are planning!

Physical Models

These are pretty rare these days as most firms have moved to digital drafting and 3D visualization software. However, some clients think better when seeing a physical model of their new home or ADU. We have built a few models for clients and they can be a valuable tool to help make design decisions. They can be time consuming if you are looking for a lot of detail. Simple massing models, or chipboard diagrammatic models can be quick and cheap, but detailed wood models can be very time consuming and could add significant cost to the design process. Still, like with the renderings, it is still cheaper to invest in the design process than try to make changes once construction begins. It is better to be sure about the design direction and sometimes physical models are the best way to think through a design challenge or capitalize on an opportunity.

Meetings and Presentations: Design Review, Community Engagement, Neighborhood Associations, Historic Review, and other meetings or presentations.

Certification Process & Applications: LEED, Earth Advantage, Passive House, Net Zero, or other certifications.


Design Process: Phase 5 - Construction Administration

It is common to think that when the approved permits are in hand and construction can begin, that the services of a designer are no longer needed. Hopefully this post convinces you otherwise. I would argue that designer’s involvement in what is called Construction Administration, is one of the most important and valuable aspects of our services. This is why we don’t take on projects that don’t have a base level of services during the construction phase. It is the only way we can best serve our clients and work together with the contractor to deliver a high-quality project that meets the design intent.

What is construction administration?

Construction administration, often abbreviated as “CA,” is a series of meetings and administrative tasks that the designer undertakes to help oversee the construction phase of the project. The goal is for us to help the general contractor interpret the construction documents correctly, translate these design drawings into the built home, and troubleshoot any problems or situations that may occur. We work closely with the contractors and clients to help deliver a high-quality end result.

Typically CA work includes regular meetings on site with the contractor and owner. Often these are at regular interviews like monthly or weekly site meetings, while on some projects we may select key times to do site visits based on the construction schedule - like before pouring concrete, after framing is complete, before drywall is hung, etc.

Is Construction Administration worth the added cost?

Too often clients think that they will save money but declining to have the designer involved in the project once the permitted plans are received. They see CA as an added cost rather than an integral part of the designer’s services. Perhaps they see this as saving money to keep project costs down. However, construction administration is not an added cost and more importantly it can save thousands of dollars and help keep your project on budget.

A basic level of CA is included in our design fees for every project and isn’t a service that can be declined. Once a project breaks ground using our design drawings we must remain involved for liability reasons as well as to allow us to help deliver a project that meets our client’s expectations. As most designers and contractors already know, it is rare that a set of plans is perfect with all of the details, specifications, and information perfectly coordinated with the existing conditions on the site. There are always unexpected changes, alterations, and various interpretations that are needed to be clarified when translating two dimensional drawings into a three dimensional building. Not only are the drawings not perfect, but often clients make last minute decisions or changes that may affect the permitted drawings, or the construction process. We are there to help work through these, minimize delays, and get any additional approvals needed to continue the work.

Designers work to help resolve issues, work through design revisions, and solve unexpected construction hiccups. It is always easier and cheaper to make changes on paper, before you build something in the field. Having the designers available to work through detail drawings, find replacement material selections, or work with the clients to make last minute design changes can save thousands of dollars and help keep the project on schedule.

What are the tasks that designers perform as part of construction administration?  

Along with the site meetings we briefly mentioned above, designers also take on some administrative tasks and help communicate important information to the General Contractors building your project.

Let’s start with expanding on site meetings. Typically we want to schedule regular monthly meetings on site with the General Contractor to observe progress and get ahead of the construction process by answering questions and providing any additional information the builders may need that isn’t in the drawings. These meetings typically take an hour or two as we go over what work has been complete, what work is scheduled for the upcoming month of work, and what information the contractor needs to keep the project on track.

Beyond the site meetings, the designer is on call to clarify questions or provide additional drawings or information. Called Requests for Information (RFIs), the General Contractor makes formal requests for information from the design team. Depending on the request, the designer may create new drawings or revise the existing ones and coordinate any changes to the approved permit drawings if a major revision is needed. Revisions may need to be resubmitted to the building department so it is important to include the designer if any deviation from the originally permitted design is made while building.

Why can’t the builder manage the construction administration process? 

The builder’s role is to take the permitted construction documents and turn the drawings into the built project. However, they are only translating the drawings and haven’t been thinking through the design and code issues for as long as the design team. At this point we have probably spent 6-12 months with the clients, working through different ideas, laying out the ideal floor plans, selecting the materials, and developing the details needed to give the contractor the right directions on what to build, and also to obtain permission from the local jurisdiction. The insight designers have from this long process is not something the contractors can replace. They also are not trained in design or how best to address code requirements or functionality of design decisions. The builder is contracted to construct what is shown on the drawings. Any changes or deviations from the drawings must be discussed with and approved by both the designer and the client before the builder can move forward with the changes.

Some contractors may argue that they can fulfill the role of designer as needed during construction. However, these aren’t contractors we would recommend for your project or who we will work with. The delivery of a high quality project necessitates collaboration. It is vital that the clients, design team, and construction team work together. We each bring different skill sets, expertise, and concerns to the table. It is only have having everyone involved will the project be a great success.

Final Thoughts on Construction Administration for ADUs and Custom Homes

By the time construction begins you have invested hundreds of hours and thousands of dollars in your project. Although it may seem the heavy lifting is behind you and all that hard work will lead to smooth sailing from here on out, this is rarely the case. Construction is complicated and there are always areas of the design that need extra thought as they turn from drawings into a building. We also know from experience that if we all work together we can avoid mistakes, resolve challenges quicker, and deliver a higher quality project. This is why we include basic levels of construction administration in our services when we work on custom residential design or take on custom designed ADUs. We respect the expertise of the contractors, the concerns of the clients, and also our unique talents. It is only by working together can your project be a true success.

Siding going up at the Sheltered Nook House, a custom residence we designed outside of Portland, Oregon.


Other Articles in Our Design Process Series:

  1. Phase I - Predesign

  2. Phase II - Schematic Design

  3. Phase III - Construction Documents

  4. Phase IV - Permitting and Bidding

  5. Phase V - Construction Administration

Design Process: Phase 4 - Permitting

This is everyone’s least favorite phase of getting a new project completed. Permitting is where you submit all of the design documentation to the local building department to be reviewed and approved before being given permission to break ground and start construction. Each jurisdiction (town, city, county, and state), has their own rules and regulations that guide the design and construction process and requirements for issuing permits. Even for small projects like ADUs, permitting requirements can add a lot of work and time onto the project.

Zoning and planning drawings, construction documents, and building permit applications are typically completed by the design professional, and submitted to the necessary offices or departments by the designer, general contractor, or in some cases a special permit expediting company. The design professional will also respond to questions and comments from the city plan checker as they review the drawing sets. It is typical to receive multiple requests for additional information from the various departments, and the design team will work with them to provide necessary additional information or make edits to the drawings to meet their requirements.

With this all being said, here are some of the aspects of the permitting process that is important to consider to have realistic expectations for what to expect:

Permit fees

It isn’t cheap to build a new project and building departments want a piece of the pie. Although fees vary greatly from city to city, you can expect to pay thousands of dollars in permit fees and system development charges. Permit fees on recent ADUs in Portland have ranged from $8,000 to almost $20,000. The fee range depends on size, value, utility connections, end use of the project, and other factors. Some jurisdictions are trying to incentivize ADUs by offering reduced fees but still, there will be a significant cost here. When you are first considering building an ADU, we highly recommend you call the local building department to ask for an estimate of the permit fees.

Department Reviews

Building plans are just one of the many reviews that take place as part of the permitting process. Each department typically has some involvement in the review and approval of building projects. Transportation departments review site plans for curb cuts, water departments want to understand utility connections, plans examiners make sure the design meets the building code, while planners review the site plan and overall design to ensure it addresses the local zoning codes. Depending on the location you may have reviews for tree coverage or removal, and other environmental considerations for the project. The point here is that permitting involves a series of reviews from the various departments in your local jurisdiction. This is one of the reasons permitting processes take months to complete and cost thousands of dollars.

Changing Rules

This comes up below in the note on politics, but we want to give it some extra attention because it is important for everyone to understand the permitting process. City councils, state legislatures, and national codes and regulations are constantly shifting as new laws are passed and repealed. Unfortunately, these don’t follow a set schedule - new rules aren’t introduced all at once and there is no set time period for rules in place to remain set, allowing professionals to learn how to accommodate new regulations. Rules can change month to month and even when the language doesn’t change, departments can decide to interpret rules differently with very little public notice. It is a frustrating but unavoidable part of the permitting process for ADUs as well as custom homes and other project types.

Checksheets

Your town may call this something different like a plan check comment, but what we mean by checksheet is a list of all the revisions, changes, or additional information the plans reviewer requests in order to approve the project. Typically each department will review the design drawings for specific things they require. For example, the water department will review the site plan for water hookups, sizing of the water meter, and calculation of fixtures to assess any fees. Building code reviewers will check to ensure the design meets all of the local codes for safety. Planners will check that the design meets the local zoning regulations. If the reviewers from each department see something in the drawing that doesn’t meet their requirements or there is missing information that they need in order to give the design their stamp of approval, they issue a checksheet. Sometimes a design may only get a checksheet with one or two items, while other times a more complex project or site may lead to dozens of checksheet items. In our experience, typically a project will get a handful of items and can usually receive a permit after one or two rounds of revisions. It is also important to read the note below about politics and subjectivity in permit reviews as this can have a big impact on checksheets and how many items or revisions are needed.

Permitting Time

This is the million dollar question and oh so hard to predict. Not only is prediction almost impossible but it seems to be getting worse and worse over time. With each added regulation, impacts from the pandemic, perpetually understaffed building departments, and unnecessary complications with the codes and regulations, permitting time can range from months to years! In some cases, like smaller more rural towns, getting permit approval my be straightforward and take days or weeks, but these are rare occasions. Working on projects in Portland would typically take 3-4 months to get approved. Cities in the Bay Area could take 6+ months and sometimes much longer. Seattle would require early submission for planning approval followed by a more intense permitting review when the full design documentation is complete. It could take 6-months to a year on these projects. And these are just rough estimates. Timing can fluctuate based on how many other projects are in line ahead of you, what the staffing situation is at the building department, and even what technology the department uses. Some still require paper submissions vs digital reviews. Call your local building department to get a sense of timeline, submission requirements. This is also information your designer should know or can research for you. In fact, we talk to the local building department as part of our pre-design services to gather as much information about permitting requirements and timeline so we can set realistic expectations for our clients and build this into the project schedule.

Expectations

You should definitely expect some changes will be required to your design in order to get permit approval. For many of the reasons discussed above, it is almost impossible to get a project approved on the first try considering the various rules and regulations and the subjectivity of the review process. Despite years of experience designers and architects are still going to have to work with the staff of the local building department to make revisions to the drawings to comply with all of the rules and regulations

A note about politics in the permitting process:

Planning regulations and building codes change constantly. The interpretation of laws within each city varies from city planner to city planner and from inspector to inspector. Some cities make it easier to get planning approval while others implement systems and processes that make some projects impossible, or simply struggle to keep up with the laws that are constantly changing. No one can keep up with all codes and regulations because they can be interpreted by city officials with almost unchecked control. Although residential designers are experts at navigating this complex permitting process, and work hard in order to get your permits efficiently, it is almost impossible to steering a project through without some challenges and hiccups. You can expect that your project will get some questions and plan checks from the planning and code reviewers. Your designer should work as swiftly as possible to make any necessary revisions and answer any questions from the city offices, but it is important to have some patience and understanding as this process is being navigated.

Conclusion

The permitting process varies a great deal from place to place. Yet it is a necessary step in the process and not one that can be avoided or shortcut. When starting your project it is worth calling your local building department to receive an estimate on the timeline and fees associated with getting your project approved and permits issued. Building in a reasonable schedule and cost into your budget and timeline can help ensure your project stays on track and meets your expectations. This is also a great topic to ask your designer about as you start the design process.

Example of Building Permit Application form from the City of Portland. Forms like this typically comprise of a few pages of information that are required for the permit department to start reviewing a project. Each building department has their own form and processes for permitting.


Other Articles in Our Design Process Series:

  1. Phase I - Predesign

  2. Phase II - Schematic Design

  3. Phase III - Construction Documents

  4. Phase IV - Permitting and Bidding

  5. Phase V - Construction Administration

Design Process: Phase 3 - Construction Documents

Once you approve the schematic design work completed in the previous phase, we will begin the construction documents phase of work. This phase includes generating the dimensioned plans and construction details needed to permit the project, describe the design intent for the construction process, and get an accurate bid from the general contractor. This is also when we coordinate our design work with engineering and additional work from other necessary consultants. Basically, this is where we take the design concept, and dive into all of the details and decisions needed to direct the construction of your home or ADU.

Construction Documents

Your design team will take the schematic design and further develop the design including developing dimensioned plans and construction details, coordinate with the structural engineers and other consultants, and work on any details or decisions that could potentially impact the construction cost. This includes the selection of all finishes, fixtures, and equipment (FF&E) - if something is to be attached to the house during the construction phase, we need to accommodate that in the construction documents. We will work with you to make all of the necessary design decisions and material selections necessary to complete the overall design of the project. 

Some of the hundreds of decisions we make during this phase include selecting the doors, windows, flooring, tile, fixtures, appliances, and other finishes. We also draw the interior elevations, cross-sections, key construction details, cabinetry layouts, lighting plans, and other drawings as needed to describe the design intent. Together, we will evaluate and review the construction scope, elements, and details to ensure that the final elements meet the project’s objectives and are aligned with your goals, ideas, and aesthetic taste.  

Each construction document set includes the drawings necessary to describe the specifics of your projects. Typical sets may include drawings such as a site plan, demolition plans, floor plans, roof plan, multiple cross-sections, wall sections, structural engineering drawings and calculations, interior and exterior elevations, construction details, as well as door, window, and finish schedules, as required. Some projects may require additional drawings or fewer drawings depending on the specifics and complexity of the project.

Although we will execute this phase with care, there are often aspects of the design that need to be updated later, during the permitting and construction administration phases of work. This is a standard procedure as part of the design, permitting, and construction process. No construction document set is ever perfect and often drawings or details need to be adjusted based on site conditions, permit review by the local building department, or codes and regulations that may change during the duration of the process.

Engineering and Other Consultant Reports 

During the design process we will determine what additional expertise or reports are required to both guide the construction process as well as get approval from the local building department. Reports and consultant work may include but are not limited to: arborist reports, hazardous materials report, wetland and riparian resource study, geotechnical report, structural engineering, energy efficiency analysis, light and shadow studies, noise study, property survey, other engineering and special inspections, and other similar reports, surveys, and/or studies. We will let you know what additional studies, reports, or consultant work will be required to complete your project as we work through the predesign, schematic design and construction documents phases.

An engineering firm or firms will be enlisted to complete any structural and/or other engineering that is required. We will get cost estimates or bids from each consultant and communicate those costs with you when applicable. All work by consultants become part of the construction documents set and the General Contractor must abide by all drawings, calculations, reports, and studies as they construct the project.

This is a drawing sheet from one of our ADU Construction Document sets, which includes a floor plan, roof plan, and reflected ceiling plan along with notes and legends to help clarify the drawings for the general contractor and their team.

This is a drawing sheet from one of our ADU Construction Document sets, which includes a floor plan, roof plan, and reflected ceiling plan along with notes and legends to help clarify the drawings for the general contractor and their team.


Other Articles in Our Design Process Series:

  1. Phase I - Predesign

  2. Phase II - Schematic Design

  3. Phase III - Construction Documents

  4. Phase IV - Permitting and Bidding

  5. Phase V - Construction Administration

Design Process: Phase 2 - Schematic Design

The Schematic Design phase of our design process is similar whether we are working on a small ADU or a large custom home. This is when we guide you through the development of the look and feel of your project. Design can be a lot of fun and the Schematic Design phase is a dynamic, collaborative process between our design team and you, the clients. Typically, we develop up to three conceptual designs to discuss various options to meet your goals and ideas. These conceptual options will include a site plan, floor plans, elevations, building sections, sketches, and the layout of the interior rooms such as bathrooms, bedrooms, kitchen, and living areas, to describe how the custom home or ADU would look and how you would use the spaces.

Presentations and graphics

In order to describe the design intent we use a range of architectural drawings and graphics to visualize various aspects of the project. You may be familiar with floor plans, but we use other drawings as well, in order to help us describe our ideas and demonstrate how the project will work and what it will look like. This includes hand sketches, computer generated perspective drawings, plans, sections, and elevations. We also often use precedent images to help you better visualize what the end result could look like. In some cases clients even ask us to build physical models to visualize what the building will look like in three dimensions.

Design is a dialogue

We share our drawings and graphics with you and also hold a series of meetings throughout the schematic design process to present what we came up with and describe how it addresses your needs and responds to your aesthetic preferences and project goals. These meetings typically start out with us presenting the work we developed, but ultimately they are collaborative work sessions, where together we edit and refine the design ideas with your feedback and input. These early discussions help us refine the design until it arrives at a design that you love.

One of the questions we often get asked by prospective clients is how they can know they will like the design we create without seeing it before they hire us. It is this design dialogue that makes us confident that each of our clients will like the design of their project. We don’t work in a vacuum and we don’t impose our design ideas on our clients. Design is an iterative process that takes your goals and ideas and couples that with our expertise and guidance to guide the project to the ideal design for the specifics of your needs. The Schematic Design phases is where we work together to craft a beautiful and functional home.

Revisions and adjustments

Once the preferred option is developed in our design meetings, the design team will refine the design to address your ideas and feedback. We make adjustments to the floor plans and location on the site, and start adding details for room layouts and ideas for materials. During the revision process we give you additional opportunities to talk through the function of each space, how the flow works from room to room, and how the project relates to the existing conditions of your property. We also discuss the big ideas for materiality, views, systems, and other elements of the building that could impact the details and cost. 

With the feedback and information from these revisions and adjustment conversations the design team will do one final round of revisions to dial in the design to the final option that will be the bases for the next phases of the project.

Additional work during this phase

Above we described the process that we guide our clients through on the design side. However, there is other work that needs to be carried out during this phase by other experts and consultants. Here are some of the things to expect.

Surveys

A survey by a licensed surveyor is required for all new construction projects. We will help identify a licensed surveyor in your area and you will contract directly with them to create a detailed topographic site survey. Often this work starts during the predesign phase but needs to be complete before we dial in the final schematic design option.

Budget Development

When the final schematic design option is decided upon it is a good time to get a rough estimate for the cost of construction. We recommend that the client engages a general contractor at this phase of the project who can create a construction estimate and collaborate with us during the following phases to further develop the design and meet the stated budget. We can help you select a contractor for this estimate work.

Perspective sketch for a sustainable custom home outside of Portland, Oregon.

Perspective sketch for a sustainable custom home outside of Portland, Oregon.


Design Process: Phase I - Predesign

Whether you are looking for a full custom home for your family, a major addition or remodel to give your existing home new life, or you want to add a new Accessory Dwelling Unit (ADU) to your property, each project begins with research to determine what is allowed and build a familiarity with the existing conditions.

Pre-Design is the first step we undertake for each project. We work closely with you and your family to establish the goals of the project, understand the various codes and regulations, research the challenges and opportunities, and document the existing conditions. This background research creates the framework for all future design work.

Specific tasks that we undertake during PreDesign includes site analysis, zoning research, project budgeting, programming, we discuss the timeline, and assemble the project team. The more information gathered during the predesign phase, the more accurate all future work can be. It is vital to dedicate the time and resources needed to thoroughly research all the various forces that affect a project as it can help avoid costly mistakes or changes further along in the design and construction process.

Site Analysis

The main goal during this phase is to gather information. During the Pre-Design phase, we will research and document your property to understand the context in which we will be designing. This starts with us measuring existing conditions, locating any features on the site that could affect the design, and documenting the property with photos for future reference. We also ask that clients engage a licensed surveyor to survey the property during this stage.

Along with analyzing the site we also research what the zoning allows for your property and any other codes and regulations that will affect the design. Sometimes things like Homeowner Associations, or district overlays can add complications to the base zoning allowed by the city, town, county, or state. We aim to identify all the various regulations that will affect the project during this research.

Programming

Next in the research phase is understanding your goals for the project, your ideas, your aesthetic values and style, and defining what a successful project looks like from your perspective. To accomplish this we meet with you to discuss what you value in a home, identify all of the spaces you require, what functionality is important, and define styles that inspire you. We have specific questions we go over and also create spreadsheets to document the specific metrics to consider while designing - things like square footage, specific rooms you want, sizes, budget considerations, and other elements of the project we need to consider when beginning the design process. This provides a foundation on which we build our architectural design ideas.

Budget

Although it is still very early in the overall timeline of design and construction, it is important to define the target budget for the project. Typically we start these conversations much earlier, as part of our proposal process, but we revisit this conversation here to verify what you are looking to invest in the project. I’d like to emphasize how important it is for clients to have an open and honest conversation about what they can afford to invest in the project. If we don’t know what you want to spend we can’t make design decisions and offer advice to meet your expectations. The more accurate of a budget we can develop, the more we can guide you through the hundreds of decisions needed along the way. It will also give us a framework to work within while we discover the ideal design solution for your needs.

Timeline

As with the budget, we give a rough overview of the project schedule during the early discussions with each new client and within our proposal. However, once we begin the work and start learning about all the various aspects of your project through our research, we can better understand how long the project may take. We thus create a more accurate project schedule at this point and identify key dates, milestones, and meetings. Once the key meeting dates are defined we build a Gantt chart schedule to outline the scope of work. We also send out calendar events for those meetings so they are on everyone’s calendar and we can keep the project on schedule.

As for this phase itself, we typically suggest budgeting 1-2 months for Predesign, depending on the type of project. Detached ADUs maybe be on the shorter end of this range, while major remodels or full custom homes can take 2 months or even longer to gather all the required information to move forward into the design phases.

Project Team

There are a range of professions that need to come together to deliver a great project. Predesign is the time to start identifying the various consultants that will work with us to define the project and craft a beautiful design. This includes professionals that will assist with the research in this phase, like surveyors, geotechnical engineers, arborists, and sometimes civil engineers. We also begin to identify and contract with the professionals we will work with later on in the design process. Knowing that people are busy we want to get your project on their schedule to enable us to keep the project on schedule. Typically we identify a structural engineer, landscape designer, and other consultants that may be needed depending on the scope of work.

We also recommend identifying and interviewing General Contractors this early in the process. Having a great GC as part of the team early on, allows us to get feedback as we embark on the design process regarding cost, constructibility, and other information that could affect the design and budget.

Conclusion

Although Predesign isn’t what people think of when they hire a designer or architect for their custom home or ADU project, it is a vital part of the design process. Investing time and effort in this initial phase can save headaches and money later on in the process. It is important to be thorough and truly understand all the variables that will affect the design work to come.

To learn more about our design process or to kickstart your project please get in touch. We would love to learn about your project’s goals and ideas and help you craft a beautiful design.


Step-by-step guide to building a custom home

Creating a custom home for your family is a wonderful opportunity to design something unique and tailored to your lifestyle. It is also a long process that takes a lot of time and expertise to get right.

We have worked with many clients who come to us at different points in the process and we create an outline of the steps needed to complete their project. To help shine some light on the full range of steps you may have to go through we’ve compiled this list.

Custom Home Step-By-Step Process:

  1. Set a budget range
    You will need about 25% of the full budget in cash and you can finance the rest through a construction loan and convert it to a typical mortgage upon completion of the project.

  2. Find a region you want to build in
    Identifying a rough area where you want to live is an important first step. It allows you to narrow the list of potential properties to purchase. Plus knowing the area can allow you to build relationships that can help later on in the process, like knowing local real estate agents, researching contractors, contacting the local building department, and more.

  3. Do code, zoning, and tax research
    It is vital to understand what is allowed to be built in the area you are looking. This could affect what town/county/state you want to pick for your custom home. For instance, some areas may have size or style restrictions for homes, or minimum lot sizes. Some may allow ADUs or guest houses while others prohibit additional structures. Certain jurisdictions will have higher property taxes or other fees that could push the project beyond your budget. These are just a few of the many considerations that you need to research for the areas you want to live. This is something a designer can help with.

  4. Get control of land
    Once you identify the region you want to live, you start looking for the perfect property for your needs. Once you find some land that will work, you either purchase it outright (typically with cash), or have a signed contract or Letter of Intent with a set evaluation period, typically 90+ days. This 90 day evaluation period gives you the right to walk away if initial research determines that you won’t be able to build what you want. Often you have to put some earnest money down to get the seller to agree to this evaluation period. It could be refundable or non-refundable so try to negotiate the best terms.

  5. Pull together the equity
    Typically you will need 25-35% of the full project cost in cash or equity for a bank to loan you difference. You can also leverage things like the value of the land as part of your equity contribution if you own it outright. For example, if the full project will be $2,000,000 for the land purchase, design fees, and construction costs you will need approximately $500,000 to $700,000 in cash or equity, and get a construction loan for the difference. If you own the land outright, and the property is valued at $300,000, than you probably will only need to bring $200,000 to $400,000 in cash while a construction loan will cover the remaining $1.5 to $1.3 million.

  6. Hire the design team
    You could hire the designer earlier to help with code/zoning research on potential properties. Investing earlier can save money in the long run if it can avoid properties that have challenging codes/regulations or difficult constructability issues. You should budget about 10-15% of the overall project cost for design services. Of the $2million budget mentioned above, you could assume $200,000 to $300,000 would cover the design, engineering, and other consultants needed to complete the design work.

  7. Get financing in place
    This can overlap with the design process, and in fact, most construction loans will want to see the design plans so they can do an estimated value of the finished project to help determine the amount they will lend. On previous custom home projects we have worked through the Schematic Design phase with our clients and they used that work to help obtain the construction loan.

  8. Design Process
    We recommend scheduling approximately 8-12 months for the design process from hiring the design team through submitting the design work for permit approval. However, this range depends on client decision making, complexity of the site, size of project, local permitting requirements, etc.

  9. Permitting
    Every project will need to be reviewed and approved by the local building department. Considering that each jurisdiction will have their own rules, regulations, and permitting process, this schedule is highly variable and hard to predict. In Portland, Oregon we experienced permitting for a custom home taking 4-5 months. In the Bay Area permitting for a custom home could be 6-months to a year and sometimes even longer. Smaller towns and rural areas tend to be a bit easier to work with and permitting can take less time than in large cities.

  10. Construction
    Once the permits are approved you can break ground on the construction of your custom home. We estimate that it can take about 1-year to build a high-quality custom home. This could be more or less depending on the site, final design, financing, weather, labor and material availability, and other factors. Most construction loans will want the build to be completed within 12 months of issuing the loan so this is important to know when building the construction schedule with your design team and the general contractor.

  11. Certificate of Occupancy
    This is one of the last steps in the construction process and includes the building inspector reviewing the built project and determining it is a safe and meets all codes and regulations. Typically this signifies the completion of the construction phase and the point in which you can move into your new home.

Additional Thoughts for a custom home:

  • Budgeting
    Many people calculate budgets on a cost per square foot basis. I really don't like or advise this. Cost per square foot can vary so much depending on decisions throughout the design process. One example: wood flooring can be $5/sf or $25/sf depending on the material you chose. Same for tile, cabinets, appliances, windows, etc. Decide what you are comfortable spending as a total sum and together we can design a project and make decisions in order to meet that number.

    • To get something you love, that is beautiful, sustainable, high performance, and high quality, you are probably looking at $1,000,000 in construction cost or more. We can design something for less, but my experience is that at the end of the day, almost all clients want something that pushes a custom home budget to over $1,000,000. That is really the floor for custom home budgets.

    • There are also lots of aspects of building that people don't consider at the beginning of the budgeting process (especially when they look at cost per square foot numbers online). For instance, does it need a septic system? A well? A long driveway/road access? Lots of excavation, site clearing, or grading? Utilities? A pool? A fancy Tennis Court? Unique landscape design? These sorts of infrastructure needs and additional features can easily add $100,000 to $500,000 or more in costs before you even start building the actual house.

  • Less. But Better.
    My belief is that quality trumps size every day of the week. Often people come to me with certain size requirements - for instance “I need a 3,000sf house” or “We require a 300sf en-suite bedroom,” but don't understand that a well designed 2000sf house or thinking about the quality of their bedroom space rather than size could actually be better for them where being more efficient in space usage can give them what they want in a smaller package. This then allows us to invest in better quality materials and systems. The point here is that we should talk about what you need in terms of rooms, function, quality, and values rather than focus purely on size. You should want a great house, not necessarily a big one.

  • Investment
    Find a property that allows you to build more than one structure. Having a main house plus a guest house/ADU/Pool House etc. would be ideal for multiple families sharing a property. Plus if you ever want to rent out the additional unit to help pay for the mortgage this would give you the best return on your investment. Or perhaps you will want to downsize when your kids leave for college and the ADU could be a perfect place to age-in-place while your rent out the larger home. Or maybe an aging family member will need a place to live in the future and the guest suite would be a great place for them to live rather than moving to a retirement home. The point here is to consider all of the potential future needs as you consider what property to buy and as we work through the design process. Even if you don’t want to build other things now, having the opportunity to add on to the project in the future could be of tremendous value.

Other Resources About Custom Homes:

If you have any further questions or would like to discuss your goals and ideas for a custom home project, please don’t hesitate to reach out.

The Sheltered Nook House, a 2,200 square foot sustainable custom home outside of Portland, Oregon.

The Sheltered Nook House, a 2,200 square foot sustainable custom home outside of Portland, Oregon.

Design Your Dream Home: Interview With Lucas Gray

Doug and Steve chat with Lucas Gray in this episode of Design Your Dream Home!

Lucas brings passion for design excellence and years of international work experience designing projects in Asia, Europe, Africa, Australia and North America. His innovative, competition winning design ideas blend sustainable building strategies and timeless architectural forms with a particular focus on materiality. He brings expertise working with diverse communities throughout the world, offering his services to community groups and nonprofits to create positive change through architecture.

Lucas' residential work focuses on sustainable modern custom homes, accessory dwelling units (ADUs), vacation houses, cabins, cottage clusters, infill developments, and missing middle housing.

Healthy Indoor Environments for ADUs and Custom Homes

There is so much more to developing a design for an ADU or Custom Home than just making a beautiful building. Our approach balances aesthetics, sustainability, high performance, and maybe most importantly, healthy indoor environments.

Great design creates healthy environments.

According to the EPA, “Americans, on average, spend approximately 90 percent of their time indoors, where the concentrations of some pollutants are often 2 to 5 times higher than typical outdoor concentrations.” Armed with this data, we look for ways to make our buildings healthy places to live to avoid polluted environments that can negatively impact your health. The most beautifully designed home is a not a success if it isn’t also sustainable and a healthy place to live. A great home needs to do all of the above.

Indoor Air Quality

Indoor air quality is one of the many considerations that guide decisions during our design process for both custom homes and custom designed ADU projects. From creating spaces that have natural ventilation and can open up to the outdoors, to selecting materials that minimize toxins and off-gassing, we help guide our clients through the decision making process that leads to a healthy home. This includes selecting natural materials (like plaster instead of gypsum board), low VOC (volatile organic compounds) paints and adhesives, and heating and cooling systems that filter out contributors to indoor air pollution. A home shouldn’t contribute to conditions such as asthma, allergens, or other irritants, and the design process can help avoid these conditions.

Open to the outdoors

Before we look to mechanical systems like air filters on an HVAC system, we look for opportunities to create passive ventilation in our homes. This includes operable windows in the areas people spend most of their time - bedrooms, living rooms, kitchen and dining areas - and other ways to make use of natural ventilation for airflow, like natural convection to create airflow. The orientation of the building, sun shading, and other passive strategies can also limit the use of active systems that can move dust and toxins throughout a home’s interior.

A common design element we use in a lot of our projects are large sliding doors that completely open up spaces to the surrounding landscape. Living in connection to nature can help make our indoor spaces healthier and more enjoyable - bringing in fresh air, natural light, as well as views into the beauty of nature.

Don’t compromise on health

When creating a home for a family we don’t believe in compromising between a high performance healthy home and great design. A healthy indoor environment is part of our thinking from the start of each design. It as integral to our process as developing efficient floor plans, beautiful aesthetics, selecting high quality materials, and integrating sustainable strategies. It is only when all of these things come together that a project meets the needs of our clients and becomes a great place to live. By adding an ADU you are taking a great first step into building a sustainable home.

A custom home in an urban area wraps around a central courtyard so all rooms have access to natural light, natural ventilation, and have views to the outdoors. Natural materials, low VOC paints and adhesives, and high quality air filters on the HVAC system round out the strategy to create a healthy indoor environment.

A custom home in an urban area wraps around a central courtyard so all rooms have access to natural light, natural ventilation, and have views to the outdoors. Natural materials, low VOC paints and adhesives, and high quality air filters on the HVAC system round out the strategy to create a healthy indoor environment.

Passive House for Custom Homes

Every project we work on strives to be as sustainable as possible within the parameters we are given. This means we are continually looking for opportunities to specify sustainable materials, lower energy and water usage, and reduce waste. We consider things like lifecycle costs and carbon emissions as we make decision decisions and guide our clients through the design process.

With sustainability as one of our core values, clients often ask us about certifications such as LEED, Earth Advantage, Living Building, or Passive House. In this post we will discuss Passive House and whether it is right for your custom home project.

Passive House standards are a set of design principles based on building science, that lead to a quantifiable level of energy efficiency. Using passive design strategies and active systems that are tailored to your specific climate and the design of your home, we can create a comfortable place to live while minimizing energy usage. To achieve this, Passive House design and construction follows theses five principles:

  1. Employ continuous insulation throughout the entire envelope without any thermal bridging.

  2. Create an extremely airtight building envelope, preventing infiltration of outside air and loss of conditioned air.

  3. Manage solar gain with high-performance windows and doors (double or even triple-paned windows depending on the climate) in order to take advantage of the sun's energy for heating purposes in the cool fall and winter months and minimize overheating during the warm spring and summer months.

  4. Utilize a balanced heat- and moisture-recovery ventilation (HRV system).

  5. Minimize the space conditioning system.

I have used these design principles to craft projects that have minimal energy usage while being extremely comfortable in all seasons. In fact, a complaint one client had after moving into an ADU we designed, was that the heating system didn’t turn on (meaning the extra insulation we put in the walls prevented the home from ever getting too cold). This is the type of complaint we actually like getting. The house performed too well for the heating system. I believe strongly in using building science to create high performance architecture, and I make design decisions with that in mind.

For those building a single family home, energy consumption and building performance are important aspects to consider when working through the design process. The orientation of the building, the size and placement of overhangs and shading devices, the amount and type of insulation, and the selection of systems all play a central role in how your project will perform over its lifespan. A small upfront investment can pay itself back many times over through comfortable and healthy places to live and lower energy bills.

The other advantage to Passive House strategies and the reduction of energy usage is to plan for a net zero ready home. By using all electric appliances and systems, and investing in insulation to reduce energy usage, we can easily add solar PV arrays that can more than offset your energy usage. Meaning your house could produce all the energy you use and sometimes even more. This not only saves you money every month, but also helps address climate change by reducing your reliance on fossil fuels.

To help encourage people to pursue higher performance building, and to help shift the industry to create the products and systems needed to achieve these goals, certification systems have arisen to verify that the goals have been achieved. The Passive House Institute US manages the certification process and offers a lot of resources to help design professionals meet their standards, and to educate clients on the benefits of this approach. For custom homes I typically don’t recommend actually pursuing certification. Rather than spend the extra money and time working through the certification process I recommend investing in better systems or adding a solar array to your project. However, for some clients having that certification is an important step proving how their home will perform.

Whether certification is pursued or not, our designs strive to meet the performance criteria laid out by PHIUS. We believe it is the right approach to designing better buildings and giving our clients healthier and higher performing homes to live in.

You can learn more about Passive House here: https://www.phius.org/

An Accessory Dwelling Unit under construction. We wrapped the entire structure with 2” of rigid insulation and 3” of rigid insulation on the roof. The continuous insulation has no thermal bridging and creates an tightly sealed envelop preventing loss of conditioned air. Radiant floor heating is the only space conditioning system and rarely turns on. An HRV allows for fresh air to circulate without losing heat energy.

An Accessory Dwelling Unit under construction. We wrapped the entire structure with 2” of rigid insulation and 3” of rigid insulation on the roof. The continuous insulation has no thermal bridging and creates an tightly sealed envelop preventing loss of conditioned air. Radiant floor heating is the only space conditioning system and rarely turns on. An HRV allows for fresh air to circulate without losing heat energy.

Understanding Cost Considerations and Scheduling for a Custom Home.

Whether we are working on a high-end sustainable custom home, or a beautiful Accessory Dwelling Unit (ADU) for someone’s backyard, we go through an intensive design process to deliver great results to each client. We take the trust people put in us seriously as we are responsible for their investment and achieving their goals and ideas. It is our job to guide clients along a design process to best manage the project budget, make the necessary decisions along the way, and develop a comprehensive drawing set that gives the builders a clear documentation of the design intent, guiding the construction process.

Designers Add Invaluable Expertise And Leadership To The Design And Construction Process.

Our job is to represent the best interest of our clients and develop designs which reflect their goals, ideas, taste, and lifestyle. This extends to managing budgets, developing a beautiful design, and addressing the project’s program. Only when our work addresses all of these factors is a project truly successful. Our design process is tailored to guide our clients through the decisions needed to deliver a great result.

The designer leads the entire project team, including consultants, engineers, contractors, and the clients, with the aim of achieving the best result possible. Like a symphony conductor, we bring all the stakeholders together and facilitate the collaborative effort needed to move the project forward and best serve the client’s and achieve their goals. This means we advise on decisions like cost implications of design decisions, identifying priorities within the program, incorporating sustainable systems and materials, and balance lifecycle costs against the initial budget.

It is only through a close collaboration between all the stakeholders can we meet or exceed your goals. This extends through the design phases, permitting process, and through construction. We are there to work with the builders, advocate for our client’s best interest, and guide the team to deliver a project that aligns with the design drawings and meets the quality standards we and our clients expect.

Great Design Doesn’t Mean More Expensive.

Developing a more comprehensive set of design drawings, carefully working through the hundreds of decisions that are needed to be made, and having a clear strategy for execution can only happen with thoughtful efforts early on in the process. Working closely with clients and the contractors as early as possible helps us hone in on the goals and scope of the project, identify the priorities, and develop a work plan to deliver high quality results. This allows us to balance the design quality, size and efficiencies, construction plan, and ultimately the cost of the project.

In short, if you want to have a higher quality result and manage the project budget, it is in your interest to pay your designer more. The greater the effort put into the design process, the more detailed the drawings are, the more decisions that are made prior to breaking ground, the less chance there is for costly change orders, and the more potential savings there will be. Investing in the design process is the best way to control your project budget and quality. The value designers will bring to your project often is greater than their fees - both in terms of added value to the end result, but also through problem solving and potential savings during the construction process. Invest in hiring a great designer to lead your project team. It is money well spent.

Cost Per Square Foot Budgeting Is Misleading.

Cost is always a concern for our clients, no matter the size of the project or the size of the budget we are managing. It is important for the three main parties, designers, clients, and contractors, to be on the same page when developing an accurate project budget. We often see architects and designers, clients and builders, use a cost per square foot calculation to identify an appropriate budget and compare costs across projects. Although this may seem like a simple way to get a target number, we find that it is often misleading and doesn’t consider many considerations that affect the final cost of a project.

The square footage of a project is not the only thing that affects the cost. For example, steeply sloped topography or a site that is difficult to access can dramatically impact the cost regardless of size. There can be dramatically different costs of labor between rural, suburban, or urban site locations. Seismic zones, hurricanes, and other climatic considerations can affect structural systems or add other costly considerations to the design. Selection of materials, systems, and fixtures can have a dramatic impact on the cost. Further, cost per square foot calculations don’t take landscape features or other external elements into consideration. Do you want patios and decks? A pool perhaps? Cost of driveways, landscaping, walkways, and other external features would not be captured in a cost per square foot calculation but are all important aspects of a project that must be considered in the budget.

The considerations above are common for larger projects and custom homes. For smaller buildings like ADUs, cost per square foot presents other challenges. There are some base costs of construction that are needed regardless of project size. Getting equipment to the site, mobilizing the construction team, running utilities to the new home, are all required if the project is 800sf or 3,000sf. Expensive parts of a home like kitchens and bathrooms are also not “subsidized” by the less expensive spaces like bedrooms and living rooms. All of this means that when you divide these costs by the smaller square footage, your cost per square foot calculations can go soaring. Where a custom home may start at $350/sf an ADU may be $500/sf or even higher.

Instead of a cost per square foot calculation, we recommend to our clients to be open with us and discuss the total amount they want to invest in the project. Having these open conversations builds trust and allows us to offer advice and guide clients through the design decisions needed to keep a project on budget. Together with our clients we can prioritize what is most important and where to invest the budget to get the best results. For instance, a slightly smaller, more efficient layout could allow you to select higher end finishes and fixtures. Quality over quantity can lead to a better end result while managing the amount invested in the project.

Design and Construction Takes Time But Not Forever

Along with budgets, project schedules are one of the biggest concerns our clients have. This is especially true of residential clients who are building a project for their families to live in. Often they are concerned that building a custom project takes too long and they can save time simply purchasing a home already built. This is understandable and designing and building a unique custom home is definitely investment of money and time, but one that will be well worth it.

It is important to be prepared for the time needed to move through a thorough design process, work through the local permitting requirements, and build the home to high quality standards. Rushing a project isn’t recommended as it will either increase costs, decrease quality, or both. A home that is crafted specifically to meet your goals, lifestyle, and tastes will pay off over the years you will live there and the generations of family that will enjoy the home together.

The more comprehensive the design process is the better the end result. Spending extra time in the design phase will allow for the team to better document the design decisions, detail the project to give the contractor more specific instructions, and will save the headaches and increased cost of making last minute decisions while the project is under construction. Spending the extra time during design will also allow the contractor to better schedule the construction phase, potentially preventing unforeseen delays.

A bit of extra time spent in design can save significant time during the construction phase. Overall, the time invested in the design and construction of your custom home will pay dividends when you get to live in the house that is tailored just for you.

Project Complexity Affects the Schedule

The duration of both the design phases and construction phase of a project is highly variable based on the efficiency of the decision making process and the complexity of the project, both in terms of the site conditions as well as the size and design of the building itself. Site conditions are part of the research we do during our initial pre-design phase, giving us the information we need to know to move forward with the design of the building. The more complex the site - topography, natural features, codes and regulations, overlays like historic districts or environmental conditions, existing structures, etc. - the longer it takes for us to complete our research and design a response to the specific conditions.

The other big variable is the time it takes clients to make decisions. When we present design concepts, discuss relevant information, and offer options for clients to consider, we understand it takes some time to review, process, and decide which options are the best for your needs. Some clients make these decisions quickly while others require longer to deliberate and decide the path to proceed upon. The more complex the project the more decisions need to be made and the greater this can affect the project schedule.

To give a rough understanding of a typical project schedule, we find that the design phases of the project can last anywhere from 6-9 months, and sometimes longer if it is a particularly challenging site or the clients need additional time. Then there is the permitting phase which can be anywhere from a few months to almost a year depending on the local requirements and process (we find that most building departments are very slow in reviewing and permitting projects these days). Once the permit is issued you can estimate about a year for construction to be completed, sometimes less, sometimes more.

Design and Construction Is Like A Symphony

Like a great piece of music, it takes a collaborative effort for all the instruments to play their part of the overall composition. To make it work, a conductor is needed to guide each player and coordinate the whole ensemble. This is the role the designer plays in your project. The designer assembles the team of consultants (which could include surveyors, structural engineers, civil engineers, geotechnical engineers, MEP Engineers, Landscape designers, lighting and acoustic consultants and other specialists), guides the client through the decisions needed along the way, and helps select and collaborate with the builder during construction. Like the symphony conductor we balance the needs of each discipline and coordinate the communication and flow of information across the team. We develop the project schedule, set key milestones, and keep the client informed of progress. We review all the work that comes in and coordinates the design of the home to respond to each consultant’s work. It is a complex job that necessitates dedications, commitment, detail oriented work, and knowledge of all the fields that contribute to the success of the whole.

This is why it is important for your designer to be involved in all aspects of the project. From the beginning we guide the research to gather the necessary information, work with the clients to hire the required consultants, and guide you through the selection of the right contractor. We follow the project from this initial pre-design work through the design phase, permitting process, as well as through construction to guide the project to completion. We are advocates for our clients along the way and help you make the best decisions for the success of the project.

It is only by having a great team, working together, that a project can be a true success. Clients, Designers, Consultants, and Contractors form a team with the same goal, delivering a design that meets the client’s goals, budget, and program, while creating a beautiful design that is inspiring.

Conclusion

Every project regardless of size is a complex undertaking. It is our job to make the process as smooth and stress free as possible. This starts by educating our clients and setting clear and transparent expectations for what to expect. Design is really a series of decisions from creating the layout and floor plans, to developing the look and feel of a new home, to diving into the details of how it will get built. It is our job to be your advocate along the way, both guiding you to make the best decisions possible, but also acting in your best interest to keep the project on budget and on schedule.

It is only by working as a team can we overcome the challenges along the way and deliver a great project that meets your goals and ideas and becomes a beautiful inspiring place to live for your family. We take this responsibility seriously, and although we have a lot of fun working with our clients throughout the design and construction process, we still understand the immense trust you have put in us and our responsibility to deliver great service.

unsplash-image-5aiRb5f464A.jpg
20170503115648812.png
plan.jpg
sheltered nook house construction siding
Sheltered-Nook-Custom-Home-Exterior-Josh-Patee-03.jpg

Who do we design for? What do we design for?

We design for the experiences you will enjoy in your home once it is finished. Our work isn’t about the object but rather about the outcome. When you hire us, we lead you through an iterative design process to craft the best home to meet your goals, ideas, and needs. The result of our work is not just a house, but rather it is a place for you to enjoy shared experiences, emotions, and memories.

We design for you and your family, your friends and relatives, and all of the people who will call that house home over the years. We design for your children and grandchildren to have a space for play and exploration, a place to learn and grow, a place of belonging and joy. We design to make you feel relaxed, comfortable, and warm. We design to make you feel welcome, safe, and secure. We design for dogs who want a space to lie next to the fire. We design for cats who wander looking for the perfect location to stretch in the sun. We design for you to experience the passing of time through light and shadows moving across the floors and walls, notches on a door frame marking growth, and the changes each season brings to the surrounding landscape.

Although the house itself is an object and of course we want it to be beautiful and functional, it is our job to design for what happens within the house throughout its lifespan; the feeling you have when you return home from a long day at work, the joy of friends gathering for a shared meal, or the relaxation that washes over you when you escape the city to your weekend getaway. It is these moments that define our work.

We don’t design objects, we design experiences. Architecture isn’t about the physical house. Our work is about what each home will do for you and all the others that will spend time there. The result of our design process is the feelings and experiences you have enjoying life in your new residence with all of your friends, family, and loved ones. These outcomes are what makes us love what we do and what makes the process of design worthwhile.

Who do we design for?

We design for all of the people who will call each house a home. We design for everything that will occupy the space over time. We design for the landscape and the environment that surrounds each home, the ecosystem we are all apart of.

What do we design for?

We design for the emotions, experiences, and memories people will enjoy within their custom homes. Our work isn’t about the object but rather the life that happens within what we create.

Rendering of the interior of the Hill House. Floor to ceiling windows connect the room to the surrounding landscape while a courtyard garden carved into the house brings light and nature deep into the interior. High ceilings and a minimalist aesthet…

Rendering of the interior of the Hill House. Floor to ceiling windows connect the room to the surrounding landscape while a courtyard garden carved into the house brings light and nature deep into the interior. High ceilings and a minimalist aesthetic make the spaces feel open and bright.

Frequently Asked Questions about Designing and Building Custom Homes

How does the design process work?

We have a set design process that we lead you through in order to deliver the best results. We break down each project into 5 phases so there is a clear and predictable path that each project moves along. We have outlined this process in detail in another post. Click the button below to learn more.

How long does it take to design a Custom Home?

This can vary greatly from project to project depending on the specifics of the property, the size of the home, and the clients. If you can make decisions relatively quickly we can design a home in 6-9 months. If you want to take your time and deliberate longer on decisions than a 1-year design timeline is a good rough estimate. Keep in mind, this is for the design work. The permitting review and construction process would be added on to these estimate. For a rough order of magnitude you can anticipate 1.5 to 2 years total from start to finish. As we mentioned in our Value statement, we want to serve the best interest of our clients and that takes time. Like the growth of the slow food movement as a pushback against unhealthy fast food, we believe quality is vital and working diligently through our process leads to the best results. And the best results take time.

How much does it cost to build a custom home?

We expanded on this in more detail here. However, as a quick estimate you can assume a custom home would start at around $1 million and go up depending on the size, the site, the quality of materials, systems, and other elements in the project. Your overall budget is really about your goals and ideas and how much you want and are able to spend on the project. We have design small homes, ADUs, that were around $300,000 and we have designed full custom homes for $1,000,000. Larger, higher-end, homes are easily $2 million or more. It really depends on what you are specifically looking for. We start our design process by interviewing you to better understand your wants, needs, goals, ideas, and lifestyle so we can deliver a project that is unique to the specifics of your life and property.

What is included in the design fee?

When any client first contacts us we listen to their goal and ideas, we then ask questions to get an intimate understanding of what they want and need, and what their lifestyle is so we can best craft a solution. Based on this analysis of the uniqueness of your project, we develop a proposal that is specific to your project and the value we can provide as designers and advisors. We also offer tiers of services that you can select to best serve your needs, expectations, and budget. This is a long way of saying, “it depends.”

Generally speaking, our design fees cover Predesign, Schematic Design, Construction Documents, Permitting, and Construction Administration. These are the five phases we guide each project through from our first meeting to handing you the keys to a beautiful custom home. You can learn more about what each of the phases covers by reading the Design Process post linked above.

What other expenses should I expect?

Outside of the design fees there are a handful of expenses that you need to consider. First is the construction cost, of course. This would be the cost of materials and labor paid to the General Contractor. There will also be a handful of consultants needed to complete your project. This includes a surveyor, structural engineer, perhaps a Civil Engineer and Geotechnical engineer (these depend on the property and full scope of design work), arborists, and landscape designers. There may also need to be energy consultants or other special consultants depending on the local requirements.

Other than construction costs and consultant fees, the other major expense will be the Permitting fees assessed by your local jurisdiction. Each city and town is different and has different fee structures so we will conduct that research and report on estimated permitting costs during our Pre-design phase.

How will I know that I will like the end result?

Design is an iterative process and involves sharing ideas, discussing your style, taste, preferences, needs, and wants. It is our job to listen to you, learn about your lifestyle, and understand what you are looking for and then transform that into a design of your custom home. Throughout the design process you will sit down with us as we present design ideas, floor plan layouts, and other drawings to describe the look and feel of your home. Together we will talk through pros and cons of different options and actually sketch ideas as we refine the design into a beautiful home that reflects your values. This iterative process has led to successful designs that our clients love as well as designs that have been recognized and won awards from the design community.

It is also recommended that you look through our portfolio, follow our instagram account, and make sure that our style and values are aligned with what you are looking for. We tend to design modern or contemporary styled projects that are connected to nature and influenced by the landscape around them. If you are looking for a craftsman style suburban home we probably aren’t the right designer for you. However, if you like the work you see on our website, I’m confident that we can design a beautiful project that you love and are proud to call home.

What drawings are included in your services?

There are two main drawing sets that are created during our design process. There is the Schematic Design set and the Construction Documents set. Each has their own specific drawings that are included. For the SD set we include a site plan, floor plans, elevations, sections, and 3D views to describe the design intent. However, to arrive at the final drawing package we do a lot of drawings as we present options and work through the iterative design process. There are a series of plans, elevations, 3D views and hand sketches that we create and use to talk through design ideas along the way.

The Construction Documents Set includes all of the drawings that are needed to both receive a permit from the local building department as well as the information needed for a General Contractor to bid and then build the project. This includes but is not limited to: general notes, a detailed site plan, dimensioned floor plans, building elevations, building sections, foundation plans, reflected ceiling plans, enlarged floor plans, interior elevations, assemblies, schedules, construction details, finishes, fixtures, and equipment lists, and structural engineering and other drawings provided by the consultant team.

Who manages the permitting process?

It is part of our standard scope of work to oversee the permitting of our projects. This includes compiling the permit drawings, filling out permit applications, and submitting all of this to the local building department. We then follow up to respond to any review questions or requests for additional information. There may be a few forms you are required to sign as the project owner, but otherwise we manage the process on your behalf.

Do you have experience working in my local area?

I have worked across the country and around the world and have had success on projects regardless of location. I worked remotely on a project in northern Alberta and I worked with communities as far away as rural Japan. I lived and worked in Thailand, China, and Germany. In earlier years I worked on the design of train stations in Russia, renovations in Berlin, and ADUs in Seattle and the Bay Area. I’ve lived and worked in Portland, Oregon and designed over 100 projects across Oregon. My home base is currently Brooklyn, NY but I travel frequently for work and pleasure. The point is, I may have some experience in your area but I also know how to work in different locations. Regardless of the location of the project, I do the research needed to understand the local rules and regulations, the local permitting process. I collaborate with local contractors and craftspeople, and of course I visit the site to understand the unique aspects of your property and the surrounding landscape.

Do you stay involved during construction?

Absolutely. It is vital to have your designer follow the project through to completion. There are always some adjustments when translating drawings into a built home and we are there to help answer questions, make suggestions, and observe that the construction is following the design intent. I will be an advocate for you during the construction process to get a high-quality home that aligns with the values and design ideas we worked on throughout our design process. A designer stepping away during construction is irresponsible and doesn’t have their client’s best interest at heart. Construction Administration is an important part of our standard services for all residential projects.

Do you have builders/General Contractors you can recommend?

Recommending contractors is part of our services. Working with trustworthy, high-quality contractors and craftspeople is key to the success of a project. In places where we have already completed projects we can recommend people we had great working relationships with. In new locations we do an extensive search to find qualified contractors to collaborate with. This means reviewing contractor websites, talking to local designers, architects, and engineers to get recommendations. We reach out to the companies that have a good reputation and interview them and ask for references to follow up with. Ultimate we typically recommend about 3 companies for each project and have you meet with them. It is important that you meet and get a good feeling for the contractor as they will be a big part of the success of your project. We want to make sure you have a good feeling about them and they are both excellent communicators and have the experience needed to build a finely crafted home.

Can we make changes to the design during construction?

Changes during construction are not recommended. Change orders are often what causes budgets to get out of control. It is always much more expensive to make changes during construction than working out design options on paper. It is also important to consider that there are many factors that influenced what was design. Changes during construction can affect structural systems or may not meet codes that were considered during the initial design. Even when contractors make suggestions for changes in order to save money, we find that often it ads as much expenses and what they think they will save. Major changes require additional drawings and details to document what is changing and need to be reviewed by the jurisdiction as a permit revision. And even small changes can cause delays and additional costs. For these reasons we highly recommend that once construction begins we all stick to the original design.

Custom Homes: How Much Do They Cost?

If you are considering designing and building a custom home there are three steps you need to take as you embark on this journey. You have to find land, find a designer and builder, and set a project budget. When people reach out to us about their projects, cost considerations are typically the first question they ask. They may already have land picked out, or are looking for our help as they consider different properties. What they are most stressed about is seeing if they can afford a project that meets their goals and ideas. Budget is top of mind and usually a big part of our early conversations. Here we will discuss the various aspects of a project budget and some numbers of recent projects so you can have a jumping off point as you consider your project.

When I read articles like this, I always get frustrated trying to find the answer to the first question. How much will it cost? Rather than make you scroll all the way to the bottom (although you should definitely read through everything) let’s get right to the chase. The answer is $1,260,000 plus the cost of land.

Of course that isn’t exactly accurate. It is impossible to give you an exact number without knowing more about the specifics of your project, but it it isn’t that far fetched. I would say that most nicely designed custom homes will start at around $1 million and go up from there. It may be possible to build something very nice for under that amount, especially if you are looking for a smaller project like a weekend getaway cabin, or some other modest project. But for most full sized houses, say 1,500 square feet and up, I would venture to guess that the final cost will start at around $1 million when all factors are considered. Keep reading for a more detailed breakdown of how these costs add up.

There are three main expenses you will need to plan for with a custom home. The first is the cost of the land. Second is the soft costs - all the fees that are needed to develop the design and get permission to build the project. Third are the hard costs - the expenses of actually building the project.

Land Costs

Unfortunately you are going to hear this a lot, but this cost is widely variable. Depending on the location, the local market, the type of land, the quality of the property, surrounding property values, views, water features, and other qualities, the price can fluctuate. For example, I’ve been looking at land in the Hudson Valley and Catskills regions of New York State and have seen land that cost $2,000/acre and others that have been over $100,000/acre. The main factors were views, if the property was on a river or lake, and the location - closer to New York City or the trendy towns in the Hudson Valley drove up the cost significantly. I am hoping to narrow in on some properties in the range of $10,000 per acre and want a minimum of 10 acres of land. So my land budget is about $100,000 to $150,000.

On the other hand, I have also been helping a client search for land in the High Desert of Oregon (a couple hours drive from Portland) and we are eyeing a property that is 60 acres for $199,000, or around $3,300/acre.

Soft Costs

When just throwing around rough numbers as you start thinking through the project budget, we recommend you allocate 20% of the project budget to soft costs with the remaining 80% going to the hard costs. This is a general rule of thumb and a good guideline to use before you start getting actual numbers to plug into your calculations. This 20% would cover design fees, engineering costs, permitting fees, insurance, financing costs, site survey, and other required expenses before ground is broken to start construction. Let’s break this down a bit further.

Design Fees
You can budget about 10-15% of the project budget for design fees. Some designers might be a bit cheaper but also may not offer the same level of service. Designing a custom home is a significant investment and you want a design team that is going to give it the time and dedication it needs to do it right and create a high-quality result. Compared to the cost of construction, design fees are still a small percentage of the overall project and not somewhere you want to cut costs. Design fees vary depending on the firm, their reputation, the budget of the project, what scope of work is included in the fee, and the local market, among other factors. In NYC we have seen 12% as a very common design fee percentage, where famous starchitect firms may be 15% or some could even be as high as 20-25%. I offer a few different tiers of design fees depending on the scope of work, 10%, 12%, or 15%.

For argument’s sake, let’s say you are looking to spend $1,000,000 on the construction of your home. You can thus budget between $100,000 to $150,000 for design fees.

Engineering/Consultant Fees
A few different engineers are needed for most residential projects: civil engineering, geotechnical (soils) engineering, and structural engineering. Occasionally we may also engage a Mechanical, Electrical, Plumbing engineer if it is a complex project, although typically we approach these systems as a design-build where the contractor who installs the system also does the design and permitting work. You can budget about 1% of the construction cost for each engineer as a placeholder before we get actual bids from companies. Fees could vary if it is a complicated site; steep topography for instance. A site survey is also required and could add another $5,000 or so in fees depending on the site. Other consultants may also be necessary like arborists, landscape designers, energy consultants, and others depending on the specifics of your project and your property.

For that same theoretical $1,000,000 project you are looking at around $35,000 to $50,000 in consultant fees.

Permitting Fees
Each jurisdiction has their own permitting process and associated fees. Typically there is a permit review fee for the actual time and effort for the building department to review the drawing set and issue an approved permit. On top of that, most cities and towns also asses system development charges for new construction. These are fees that cover town expenses for infrastructure and services like roads, schools, utilities (water and sewer systems), parks, and other amenities.

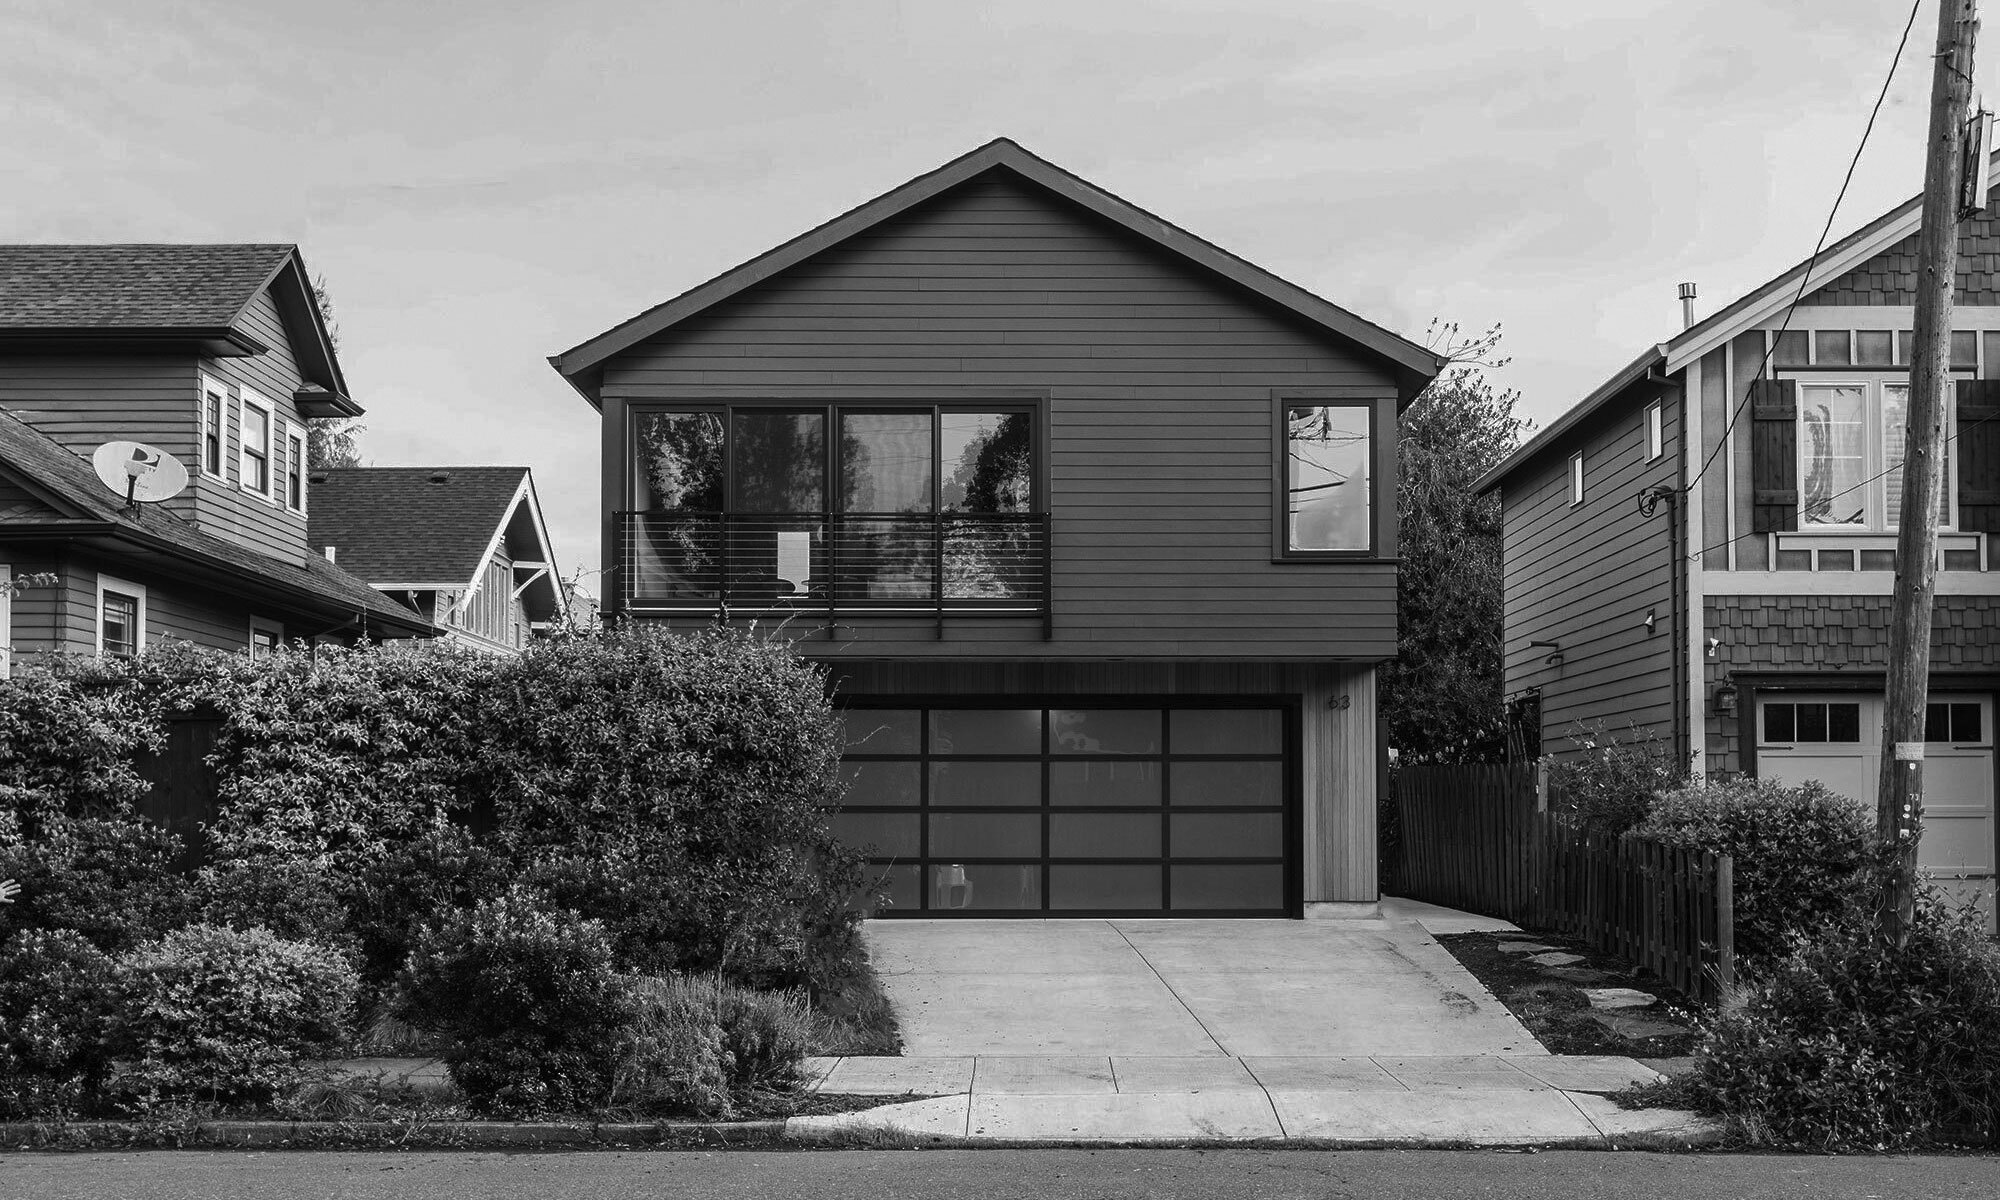
On a custom home we completed in Portland that was valued at $750,000 in new construction, the total city fees came in around $47,000.00. That includes about $16,500 in permit fees and $30,500 in System Development Charges (SDCs). That is a lot of money! Not every jurisdiction will be this expensive to get a permit. Call the town where you are planning to build and talk to someone in their building department. Alternatively, many places have permit fee calculators on their building department websites.

Let’s use $50,000 to be conservative.

Insurance
It is recommended that you carry insurance during the construction process. This would cover things like unexpected events: think fire, weather, vandalism, or theft. The goal is to have security that if there is an issue during construction your insurance would cover losses or increased expenses to prevent the bank from foreclosing on the project. Policies vary depending on deductible and coverage amount. Annual premiums can range between 1% and 4% of the project cost but call an insurance company to get specific quotes.

Say 1% for now, for $10,000.

Financing Costs
This would be the cost of securing a construction loan, plus the interest you will pay throughout the project’s construction. Most construction loans work like a line of credit, so you make monthly draws to pay for the General Contractor’s labor and materials. You then start accruing interest on that balance until the project is complete and you then refinance into a more traditional mortgage (at a lower interest rate and a longer loan term). Closing costs on the loan could be around 1% of the loan amount, and interest can add up quickly - probably around 5% of the loan amount over the course of year, although the actual amount will depend on the interest rate and length of construction.

Say $50,000 for the loan fees and 12 months of interest accrual.

Altogether we are right around $260,000 in expenses (using 10% for design fees) on top of the estimated construction cost of $1,000,000. That is almost exactly 20% of the project cost ($260,000/$1,260,000).

Hard Cost

Before construction has even begun you have already spent about 20% of your project budget, more if you include the cost of land. We understand it is stressful being this far into the project without even seeing progress on the site. This is why everyone is so excited when that permit approval arrives and construction can begin.

At this point the cost of your project shifts from the design team to the General Contractor. The GC will take over leading the project and will typically invoice monthly based on the construction progress and the month’s labor and material costs accrued. This monthly invoice will be approved and then sent to the bank to issue payment from your construction loan.

Let’s discuss how we can estimate the cost of construction. First, I’d like to state for the record that I dislike cost per square foot calculations. All square footage isn’t considered equal, so we shouldn’t assign the same cost evenly across the project. Kitchens and bathrooms are expensive with all of the electrical work, plumbing work, casework, cabinets, counters, tile, etc. On the other hand, bedrooms, typically just empty rooms, are cheap square footage. So adding a second kitchen is much more expensive on a cost per square foot basis than adding an extra bedroom. This all being said, sometimes cost per square foot is the easiest way to make quick calculations. Let’s walk through some calcs.

Typical construction costs for a nice custom home start at around $350 per square foot and go up from there. For example, a new construction 2,500 square foot home would have a rough construction budget of $875,000 (2500 x $350). However, if you are looking for something more towards the luxury side, you could start seeing cost per square foot approach $500/sf or even higher. There are hundreds of decisions we will make together throughout the design phase that will affect this cost. In our $1 million dollar house example mentioned in the soft costs section, we would be looking at about $400/sf.

Why do I hate cost per square foot so much? Let’s say you want a smaller house - more of a weekend getaway in the mountains rather than a larger home for full-time living. In that case maybe you only need a nicely designed 1,200sf home. Using the cost per square foot calculation you will get a construction cost of $420,000. Sounds great. However, that is misleading. The expensive parts of the home (kitchens and bathrooms, excavation, and utilities, etc. ) aren’t being subsidized by as much cheap square footage (bedrooms, dining room, etc.). You should expect the cost per square foot for smaller projects to be higher than larger homes. For some of the Accessory Dwelling Units (ADUs) we have designed, cost per square foot often came in at around $500/sf or more, and we even saw a couple come in closer to $800/sf (one was on a steeply sloped site with complicated foundations and structural requirements).

For nice round numbers, from my experience I would say a high-quality ADU would start at $250,000 in construction cost or $300,000 in full project costs and up. A small vacation home would start at around $500,000 in construction cost or $600,000 in full project cost and up. Meanwhile, a full custom home would start at around $1,000,000 in construction cost and $1,200,000 in full project cost and go up from there.

Other considerations for Construction Cost:

Clients have immense control over the final cost of their projects. We guide you through the hundreds of decisions to be made but at the end of the day you are the one who has the final say on what you are willing to spend, and make the decisions that affect the cost. For example, you can get tile for the bathroom that cost $3/sf or tile that costs $30/sf. Kitchen appliances could be a few thousand or $30,000. Windows and doors can be cheap vinyl or luxury triple-pane, high-efficient, European tilt-turn windows for hundreds of thousands. Roofing, siding, flooring, structure, heating/cooling systems, hardware, lighting fixtures, and dozens of other decisions will have large impacts on the final cost.

Of course the property you pick at the beginning will also impact the construction cost. Steep slopes could necessitate more expensive structure, retaining walls, and other site expenses. Granite bedrock close to the surface can make excavation extremely expensive, especially if you are considering a basement. Having to clear trees, or level a flat part of the site can add costs. If the building site is far back from the street you could have to build a long driveway and pay to get utilities back to the house location. If the property is rural and necessitates a septic system or water well, rather than tying into the city utilities, that could add significant cost. These are all reasons it is important to do due diligence and maybe even hire the design team prior to putting in an offer on a piece of land.

Conclusion

There is a lot to think about. Budgeting needs to be well thought out and will be affected by lots of outside forces and personal decisions. These numbers are just rough guidelines to get you started as you consider your options. Most importantly, we are happy to talk with you about your goals and ideas and offer any advice or insight based on the specifics of your project. Don’t hesitate to reach out with any questions. We can also help you crunch some early numbers and even help you find land if you want some help looking for the right property for your dream home. Let us know how we can help.

The Hill House is a schematic design we developed for a client in southern Washington State. The estimated construction cost was around $500/sf for a total cost of around $2,000,000. Excavating on a sloped site to get a basement garage, concrete and…

The Hill House is a schematic design we developed for a client in southern Washington State. The estimated construction cost was around $500/sf for a total cost of around $2,000,000. Excavating on a sloped site to get a basement garage, concrete and steel construction system, and the floor to ceiling window package were significant drivers of this cost.

 
The Sheltered Nook House was a very cost effective project coming in at around $350/sf for the house itself. At 2,200 sf the cost was around $780,000 for the house structure. On top of that was the cost of the land, cost of installing a well and sep…

The Sheltered Nook House was a very cost effective project coming in at around $350/sf for the house itself. At 2,200 sf the cost was around $780,000 for the house structure. On top of that was the cost of the land, cost of installing a well and septic system, some site grading, some excavation and retaining walls. The total project was closer to $1,000,000 when considering those other costs.

 
This Accessory Dwelling unit is just 700sf and ended up at around $400/sf. Smaller projects have a much higher cost per square foot since they have all the expensive parts of a full house but without the cheap space (extra bedrooms, living and dinin…

This Accessory Dwelling unit is just 700sf and ended up at around $400/sf. Smaller projects have a much higher cost per square foot since they have all the expensive parts of a full house but without the cheap space (extra bedrooms, living and dining rooms, etc.).

This project is around 1,200sf with a project cost of about $360,000 for a cost per square foot of around $300/sf. This is one of the more affordable projects we have done with the goal of balancing nicely designed spaces with affordable materials. …

This project is around 1,200sf with a project cost of about $360,000 for a cost per square foot of around $300/sf. This is one of the more affordable projects we have done with the goal of balancing nicely designed spaces with affordable materials. Fiberglass windows and doors, hardie-siding, asphalt shingle roof, Ikea kitchen, and affordable tiles and floor materials kept the cost down. Plus the 1,200sf includes the garage area which is a simple empty room with concrete floor and drywall walls.


Design Inspiration: 4 Historically Significant Custom Homes

These projects are pillars of residential design in America - projects that are studied in architecture school and still resonate with custom home designers today. Innovative at the time, they have stood the test of time and still reflect a lot of the values people look for in their homes today. Each has a relationship to the land, takes advantage of views, and are experimental with materials and structure.


Stahl House (Case Study House No. 22) - Pierre Koenig

Where the homes I feature below are more about a connection to nature and landscape, this incredible house is all about the city. That view demanded that the architecture be open, transparent, and light on its feet. The modern aesthetic and steel structure are perfect responses to this context, giving the home a lightness that appears to float out over the city lights below. That view will never get old and the architecture is perfectly crafted to respect the drama of the site and recede into the background.

Book: The Stahl House: Case Study House #22: The Making of a Modernist Icon


Fallingwater - Frank Lloyd Wright

I was lucky enough to visit this house back in 2006 while driving cross country to attend graduate school where I earned my Master’s of Architecture degree from the University of Oregon. I snapped the photos below on an old digital camera so please excuse the resolution and focus. I’m not sure there is a more recognized house in the world, or one that sits in a more incredible setting. Despite seeing hundreds of photos over the years, visiting Fallingwater in person was a transcendent experience. Feeling the spaces, experiencing how the home is woven into the landscape, seeing how the interior flows outdoors, demonstrates just how spectacular this design really is. These images don’t do it justice. Go visit this house in person. It will exceed your expectations.

Book: Fallingwater


Farnsworth House - Mies Van Der Rohe

A house distilled down to the bare minimum, this design elegantly sits in the landscape while the interior is wrapped with views out over the surroundings. WIth the simple structure, slight elevation from the land, and an ultra simple form, the architect used minimalist design to compliment the beauty of nature. The interior is all about the 360 degree views out with the floor to ceiling glass walls the wrap the entire home. The spaces within are divided by the service core, meaning there are practically no walls that impeded the views of the outdoors. This may be one of the most influential houses in American architecture and reflects many of the values that I strive for in my work: touch the ground lightly, emphasize the indoor-outdoor connections, keep the form simple, use a minimal material palette.

Book: Broken Glass: Mies van der Rohe, Edith Farnsworth, and the Fight Over a Modernist Masterpiece


Eames House (Case Study House No. 8) - Charles and Ray Eames

The proportions, materials, prefab elements, and color composition of the exterior is what you first notice about this house. Yet more importantly is how the house sits on the site. Nestled into the hillside the house is protected on one side, while the double height facade on the other, opens up to a meadow and a grove of eucalyptus trees on the other. It is this relation to the land that makes this house what it is. Too often modern architecture is thought of imposing it’s rigid form on the surroundings. Yet the truly great homes strike a balance between their form and structure and responding to the specifics of their site. It is this sensitivity, that Charles and Ray Eames displayed in this project, that I’m inspired by.

Book: The World of Charles and Ray Eames


These are some of the most famous houses in America, inspiring countless architects and designers over the decades. They celebrated new materials and construction technology. Their style was a stark departure from the more ornamental aesthetics of earlier home design. Yet, what makes me fall in love with them is how they each celebrate the natural surroundings despite their distinctly industrial material palette and structural systems. This juxtaposition both celebrates how they were built while still paying deep respect to the landscape. This combination, designing for the specific strengths of each material while crafting a response to the specifics of the land, is what I love about residential design. Working with clients that share these values, exploring each site, and working through design iterations to reveal the ideal solution is what makes design so much fun.


What You Need To Know Before Building A Custom Home

Building a custom home can be an exciting and rewarding experience, but it's important to be well-prepared before starting the process. These projects can be more complicated and stressful then they appear so it is also advised to hire an experienced design team to help guide you through the process. Here are a few things you should know before building a custom home:

  1. Set a custom home budget.

    Building a custom home is a significant expense, so it's important to set a budget that you are comfortable investing in the project. More importantly, it is important to be transparent and share your accurate budget numbers with your designer and general contractor. Transparency and trust will make the project more successful, so be open with discussing what you are comfortable spending with your design team. As you are calculating your custom home budget, be sure to factor in all of the costs associated with building a home, including the cost of land, materials, labor, permit fees, design fees, and any additional features or amenities that you want to include. You should also be prepared for unexpected costs that may arise during the construction process, so building in a contingency amount is recommended.

  2. Choose the right location for your custom home.

    The location of your custom home will be a key factor in its value and appeal. Consider factors such as proximity to schools, public transportation, and amenities like shopping and dining. You should also consider the long-term prospects for the area, including the potential for future development or growth. You want your investment to pay off, and in general, real estate tends to appreciate in value over time. Location can also impact other aspects of your project like, availability of material and labor, cost of mobilizing a construction site, complications with foundations and structure. Engage your design team to talk through to the pros and cons of your property and the ideal location to place your project on the site.

  3. Work with a reputable and experienced residential builder.

    Building a custom home is a significant investment, so it's important to choose a reputable builder with a proven track record of delivering high-quality homes on time and on budget. Research and compare builders in your area, and make sure to get references and check their credentials before making a decision. We also advise picking the builder based on reputations, skill, and alignment of values. Don’t select a contractor based on price as often the cheapest builders will end up cutting corners. Pick a contractor and then work with them and your design team to develop a design that meets your budget.

  4. Choose the right design team with custom home experience.

    A good design team can help you turn your dream home into a reality. Look for a team that has experience in custom home design and a track record of creating functional and visually appealing homes that align with your taste and values. You should also consider your personal style and preferences when choosing a design team, as they will be working closely with you to bring your vision to life. A great designer is worth the investment and a well designed home will be worth more in the long run. This isn’t a place to cut corners or tighten your purse strings. Investing more in the design phases can save you thousands of dollars in construction, and can lead to a home that is much more enjoyable for you and your family and much more valuable as an investment.

  5. Plan for the future with your custom home design.

    While it's important to focus on the present when building a custom home, it's also a good idea to consider the future. Consider factors such as the potential for future family growth or changes in your lifestyle, and design your home with these changes in mind. This can help ensure that your custom home will meet your needs for years to come.

Overall, building a custom home is a significant investment that requires careful planning and preparation. It is recommended that you assemble a talented team to help you achieve your goals. A talented designer, trustworthy builder, a great location, a carefully crafted budget, and a long term plan can take the stress out of the process and help ensure your new home project is a resounding success.


Interested in starting a custom home project with us? Tell us about your goals and ideas using the form below:

Design Inspiration: 4 More Custom Homes We Love

In our first design inspiration post we discussed how we are inspired by the creative work of others and use precedent studies to influence our own design practice. We are returning to this theme to share four new projects and firms that we admire and have impacted our approach to residential design. These reinforce our love for homes that are woven into the landscape. We also included a couple of smaller scale projects that are more modest than the sprawling luxury homes in our first post. Great design is needed at all scales and all budgets.


Lake Flato - Aegean Pool House

This project is a small guest house and pool house but reflects many of our design values. The celebration of structure is prevalent as the architects highlighted the columns and beams that support the roof. The stone chimney and concrete walls ground the project, while natural wood finishes make the interior spaces feel warm and inviting. Each room opens to the outdoors allowing life to flow from the interior out into the landscape. Large roof overhangs create outdoor rooms that encourage life and activity to take place outside. Meanwhile the simple modern form and shed roof let the materials and details be the center of attention. This is a superb little project.


Rick Joy - Tucson Mountain House

Rammed earth is one of our favorite materials and we can’t wait until we have a client that lets us explore designing with it. The thickness of the massive walls exude a feeling of being grounded and protected. The texture and color of the earth give the walls intimate scale and celebrate the unique qualities of ground from which they are made. Juxtaposing this heavy weighted material, large window walls and openings allow the interiors to remain open to the landscape and be illuminated by natural light. Once again, the materials take center stage while the form is relatively simple and subdued. The main move is the butterfly roof which gives the home a dynamic feel while responding to the mountain peaks and valleys surrounding the site.


Nature Humaine - Poisson Blanc

This humble cabin fits perfectly into the snowy landscape of Quebec. Unlike the past two projects, the materials recede into the background while the large windows allow the exterior to the be focal point. With such a modest footprint, the design is pared down to the basic necessities with bedrooms tucked below the vaulted living spaces above. This organization of spaces responds to the sloped site and gives the primary living spaces better views out into the forest. Inside, the single wood casework wall defines the space and creates a warm counterpoint to the white interior. I would love to spend a weekend here with friends and a great book or two.


MW Works - Whidbey Farm

One of my favorite houses, I love how this home meanders through the forest, with the architecture seemingly placed to avoid the majestic trees. Again, the natural materials on the interior and exterior compliment the surroundings with the simple material palette of stone walls, natural wood, and black accents. This home does a great job at making the exterior become part of the interior life, with window walls, and corner glass that open each room to the outdoors. The kitchen and bedroom in particular are beautiful spaces that show the power of borrowed vies. The large overhangs further encourage outdoor living and connecting the home to the landscape.


Once again we are drawn to homes that are interwoven with the surrounding landscape. Indoor spaces that flow outdoors and blur the boundaries between indoors and outdoors reflect how we want to live. Being connected to nature makes life more enjoyable as we can experience the changing of seasons or even the shifts of weather throughout a day. Each of these projects reflect these values and do an excellent job of creating clean modern homes that feel rooted in the specifics of place.

If these projects inspire you and reflect your values, please reach out to us. We would love to collaborate on crafting a design for your custom home that reflects your lifestyle and is seamlessly integrated into the specifics of the land. Homes that compliment nature and inspire a more connected life.


The Importance of Designing for Acoustics

Below is an expert from my newsletter discussing the acoustics of the built environment. Acoustic design should extends into the places we call home. Too often, design focuses on the visual senses. We care so much about how things look or how light impacts a room that we forget the other senses that a design should consider. Acoustics in particular can turn a beautiful space into an uncomfortable place to live. Whether it is blocking the noise of the outside, creating a quiet place to read and think, or finding ways to introduce the sounds of nature into the interior, acoustics are something that are an important consideration as I design homes.

A snowy walk through the streets of Fort Greene, Brooklyn reminds me of my childhood. It has been 17 years since I have lived in a climate that has snowy winters and it is a pleasure waking up to snow blowing past our apartment windows, covering the surrounding rooftops, and accumulating on the streets. Snow transforms the city in many ways. Often overlooked and under appreciated is how it transforms the city’s acoustics.

I love cities and have lived in some of the largest and busiest urban centers in the world. From the frigid winters of Montreal to the heat of Bangkok, the crowds of Shanghai to the artistic hub of Berlin, the outdoor paradise of Portland to my current home in New York City, each place has it’s own character and pace of life. And each has it’s own soundscape.

Almost every morning in Portland I was unpleasantly awoken at sunrise by the screech of crows. Here in NY there is a constant drone of the noises of city life. Traffic roars along Flatbush; people unrelentingly express their love of car horns; sirens grow and fade as ambulances or police race through the streets; helicopters whirl overhead as they crisscross the sky carrying police or billionaires to some important destination. The biggest downside to life in a city is this constant noise.

Snow changes all of that. Traffic dissipates as people huddle indoors. With less traffic, there are fewer car horns, reduced tires on the roads, and less emergencies needing attention - thus fewer sirens. Flights are grounded leaving the sky clear of human made sounds. Meanwhile the falling snow blankets the city with an acoustic carpet, deadening the audible soundscape.

It is refreshing, and a reminder that cities are more pleasant without the rumble and rattle we all make. The quiet streets are a joy to wander down. In the park you hear the deadened sounds of children laughing as they sled and play in the snow. An occasional dog barks. You hear the slight wind or creak of trees. The snow muffles the intruding sounds beyond the park’s borders.

We need to remind ourselves that cities don’t have to be so noisy. We can design places that have better acoustics and thus create better places to live. We can restrict traffic - either by closing streets, removing lanes, or implementing congestion pricing. Adding protected bike lanes would encourage people to drive less. Charging for parking and subsidizing public transit would further reduce car use. Electric vehicles can replace the roar of combustion engines. It would be an easy political win to ban helicopters as they are completely unnecessary and only serve a tiny handful of people.

The design of our streets, public spaces, and buildings can consider the acoustics of the urban environment just as they respond to climate, weather, and other functions. While we currently focus on how things look, we rarely discuss how the built environment impacts how things sound. I hope this changes.

Cities can be places where the noises of nature outweigh the sounds of human. Sirens and traffic could be the exception rather than the dominant force in the urban soundscape. I’d rather hear the sounds of wind, the songs of birds, or simple have quiet spaces to walk and think, even when I’m in the heart of a dense urban environment.

Subscribe to our newsletter here: lucasgray.substack.com

Design Inspiration: 4 Custom Homes We Love

As part of our design process we are continuously searching out other projects that inspire us. We use precedents to see how architects that we admire address similar challenges of designing custom homes. We look for creative uses of materials and try to understand how things were detailed. We look for layouts and forms that could be relevant to projects we are working on. Precedent studies are also helpful to share with our clients to learn what they like and challenge preconceived ideas for what a home can be. Below are four homes designed by some of our favorite residential architects that inspire us. These are projects that we find are incredibly beautiful and reflect some of our design values.


Bates Masi Architects - Underhill House

There are three big reasons why I love this house: natural materials, strong connection to the outdoors, and the courtyards. The architects did an incredible job at blurring the lines between interior and exterior space, with sliding doors that open the corners of the rooms, making the structure dissolve into the surroundings. The courtyards that puncture through the house bring light and nature deep into the flow of the living spaces. Despite using a traditional material, cedar shingles, they created an undeniably contemporary design. The warping forms of the roofs, large window and door openings, and corner openings reinforce that this is a contemporary home while the shingles harken back to the traditions of the area. This is a superb design that reflects a lot of our design values: materiality, connection to nature, and craftsmanship.


Cutler Anderson - Beaux Arts Residence

This house is beautifully integrated into the landscape with the walls of glass making the living spaces feel like they are outdoors. I love the celebration of the exposed structure and the fact that the interior is all natural wood - no drywall to be found. Elevating the roof of the living spaces give it a lofty feel and the clerestory windows bring in natural light from all sides - accentuating the connection to the outdoors and the cycles of the days and season.


Olson Kundig - Delta Shelter

A project I’ve admired for years, the Delta Shelter is a perfect example of how great design can come in a small package. Bigger doesn’t mean better and this shows that quality transcends quantity. The setting is incredibly beautiful and the architecture compliments the surroundings. And of course, this project has the Olson Kundig trademark of mechanical gears that transform the structure into something dynamic. In this case, wheels, gears, and chains allows the entire home to be opened up or closed down to protect the expansive windows that connect the interior with views to the surrounding forested mountains. I also love the simple material palette of steel structure and wooden infill panels - again, no drywall is used allowing the interior to have the warmth and texture of natural wood permeate the space.


Glenn Murcutt - Fredericks / White House

I was lucky enough to participate in the Glenn Murcutt International Masters Class back in 2008. It was an incredible experience studying with Pritzker Prize winner Glenn Murcutt along with a handful of other incredible australian architects. It was an intensive two-week design studio and during my time there we were also able to visit a few completed houses designed by the teachers. This one, the Fredericks/White House, was particularly inspiring in the way Mr. Murcutt was able to take standard industrial materials to wrap a house that exudes suck warmth on the interiors. The simple form allows for the details of the interior to be the driving force behind the design. The architecture is further informed by its response to the local climate, with sun shades, indoor-outdoor rooms, and water collection all becoming an integral part of the design expression. The photos below are a few that I took on my trip. They aren’t great and don’t fully capture the beauty of this project.


The common theme in these projects and in our own work is the importance the landscape has in the quality of these homes. Blurring the lines between indoors and outdoors, integrating the homes into the surroundings, and taking advantage of borrowed views are all vital to creating beautiful residential projects. We hope that these projects inspire you as much as they have us. And if these projects resonate with you, please reach out as we would love to work with you to craft beautiful spaces that are warm, inviting, inspiring, and respond to the natural world around us.